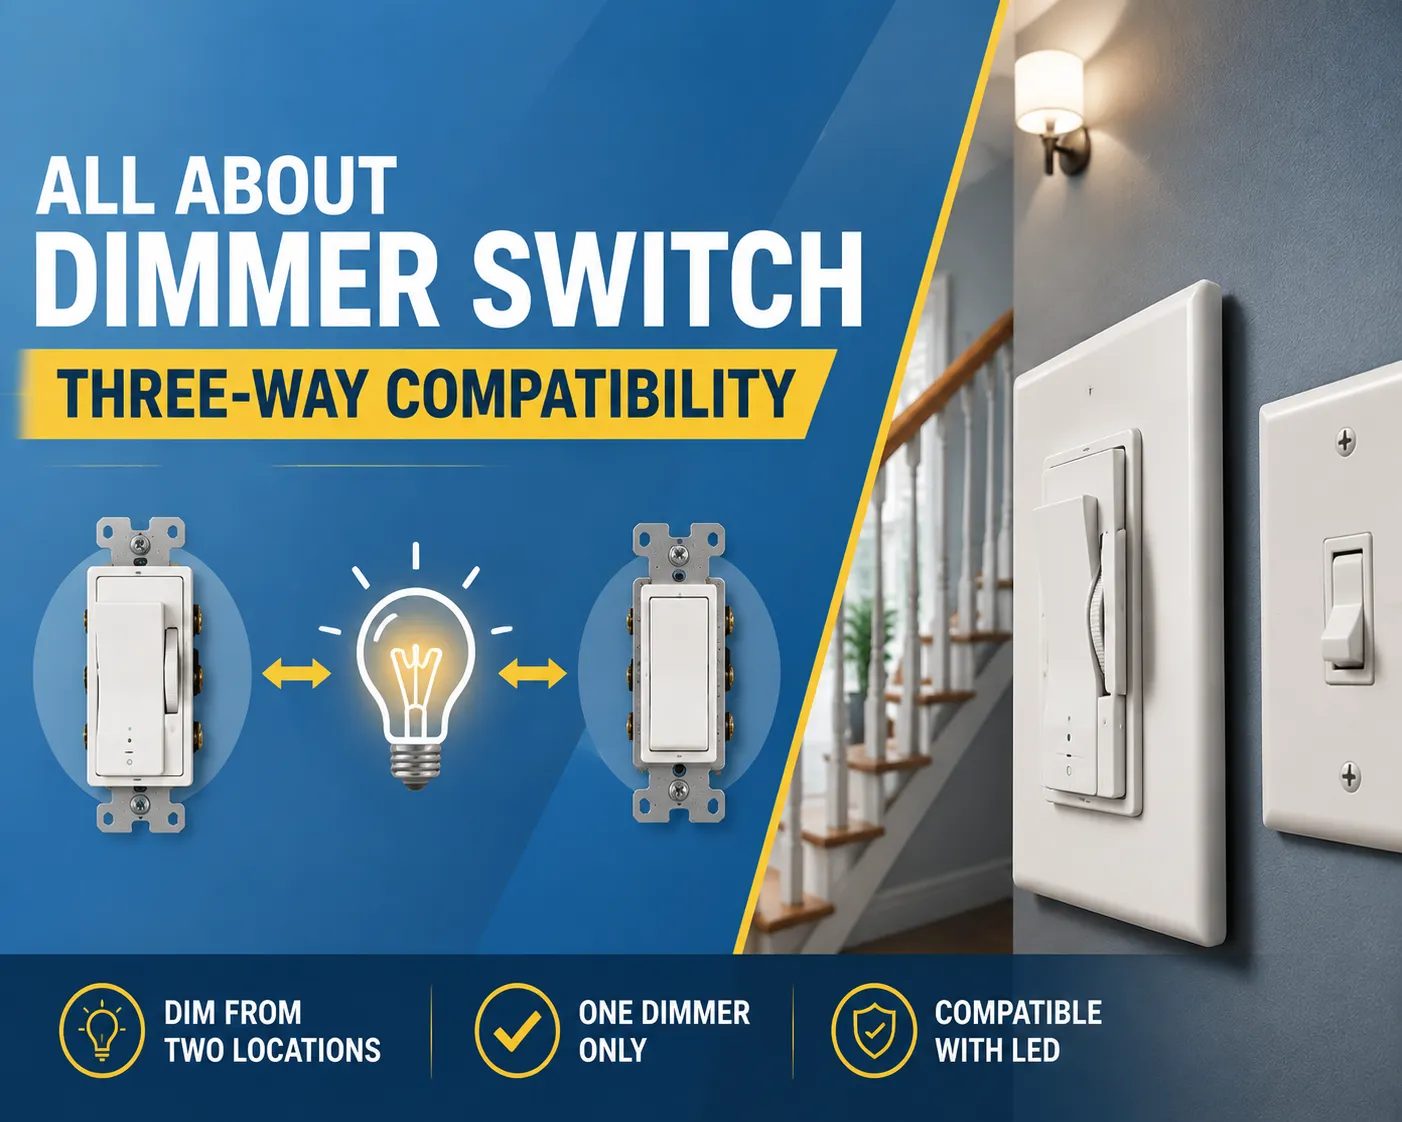
Cuando tienes una luz de escalera controlada mediante dos interruptores diferentes y quieres que sea regulable, compras un dimmer y primero vas a la caja del interruptor, solo para encontrar tres cables sin un lugar obvio para conectarlos. Puede que hayas comprado un producto etiquetado como “dimmer de 3 vías” y te preguntes si necesitas otro en el otro extremo. Más entusiastas del bricolaje en proyectos domésticos se confunden con la compatibilidad del dimmer de 3 vías que con casi cualquier otra tarea eléctrica porque un dimmer de 3 vías no funciona como dos dimmers ordinarios ni como un dimmer de polo simple. Si te equivocas, descubrirás que no puedes atenuar la luz, no puedes apagarla desde ambos lugares, o que se produce parpadeo y zumbido que arruinan toda la iluminación de la habitación.
Esta guía te proporcionará toda la información que necesitas sobre la compatibilidad del dimmer de 3 vías, incluyendo cómo funcionan los circuitos de 3 vías, qué dimmers pueden usarse con ellos, si necesitas uno en cada extremo, cómo cablearlos correctamente, qué bombillas pueden usarse y cómo elegir el correcto sin necesidad de un electricista.
Respuesta breve: Nuestro interruptor dimmer funciona también en un circuito de tres vías y solo requiere un dimmer en una ubicación mientras que la ubicación final debe conservar el interruptor mecánico estándar de tres vías. La mayoría de los dimmers de 3 vías están etiquetados como “single-pole/3-way”, exactamente igual que cualquier interruptor de tres vías regular en términos de lógica de cableado, lo que significa que el común del dimmer tomará ya sea línea o carga, mientras que los dos viajeros conectan los terminales viajeros correspondientes del interruptor “compañero”.
En cuanto a compatibilidad, aquí está la regla de oro: un dimmer de 3 vías y un interruptor estándar de 3 vías al final – no es necesario tener dos dimmers en el mismo circuito de 3 vías.
Cómo Funciona un Circuito de 3 Vías (Refresco Rápido)
Un circuito de interruptor de 3 vías permite operar una luz desde dos ubicaciones diferentes. Cada interruptor incluye un terminal común y dos terminales viajeros. El cable caliente se conecta al terminal común #1, el cable de carga al terminal común #2, y ambos cables viajeros se conectan a ambos terminales viajeros de los interruptores. De esta manera, cambiar cualquiera de los interruptores modifica la ruta de conexión a través de un cable u otro, encendiendo o apagando la luz.
Esencialmente, este tipo de circuito se usa también para interruptores de 3 vías, con la única diferencia de que se incorpora maquinaria de atenuación en el circuito.
¿Se Puede Usar un Dimmer en un Circuito de Tres Vías?
Es posible usar un dimmer en un interruptor de 3 vías, sin embargo, esto solo funcionará si el dimmer que compras ha sido específicamente clasificado para aplicaciones de 3 vías. Busca en el empaque palabras como “single-pole/3-way” o “3-way capable.” Un dimmer que solo está clasificado para aplicaciones de polo simple tiene solo 2 conexiones de cable y no puede reemplazar ninguno de los 3 interruptores en un sistema de interruptores de 3 vías.
¿Por qué es tan importante? Un atenuador de 3 vías tiene un diseño interno que asegura que el atenuador aún encienda y apague la luz sin importar la posición del segundo interruptor, por lo que la función de atenuación funciona sin importar la posición del segundo interruptor. Marcas excelentes como Lutron, Leviton y otras fabrican atenuadores con características de 3 vías; la mayoría de las veces, se pueden reconocer fácilmente por la etiqueta “3-way” en el número de modelo o por la etiqueta “SP/3W” en el empaque.
¿Necesita un atenuador en ambos lados?
No — con un circuito de 3 vías, solo necesita UN atenuador. La otra ubicación tiene un interruptor mecánico simple de 3 vías (o puede tener el interruptor complementario del fabricante si el suyo es un sistema inteligente). Aquí está la razón:
- Al usar un atenuador con un interruptor ordinario de 3 vías, el atenuador controla las luces desde su ubicación mientras que el interruptor simple controla las acciones de encendido/apagado desde la otra ubicación, logrando así una funcionalidad completa.
- Nunca use dos atenuadores ordinarios en un solo circuito de 3 vías porque competirán entre sí, causando parpadeo y zumbido y regulando la luz incorrectamente.
- La única excepción a esta regla es cuando un paquete de atenuador inteligente contiene dos productos especiales que están conectados entre sí (por ejemplo, un atenuador inteligente y su interruptor adicional o dos atenuadores inteligentes que se comunican). Tales productos están diseñados para funcionar juntos.
El principio básico de usar un atenuador convencional (no inteligente) es un atenuador en combinación con un interruptor simple.
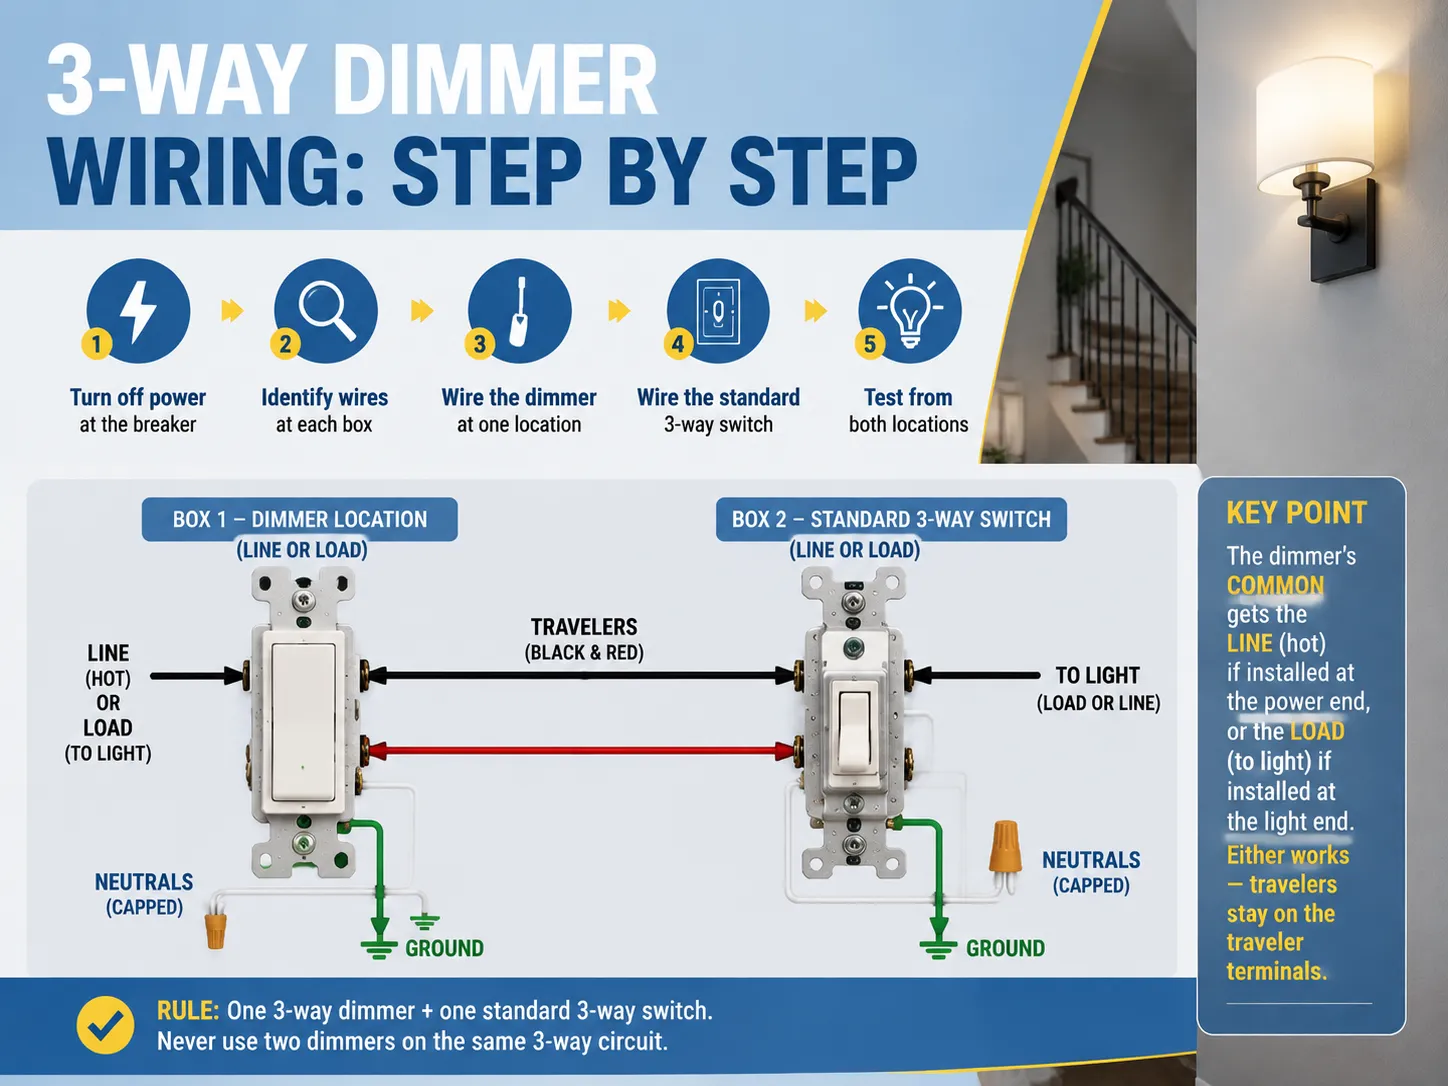
Cableado de atenuador de 3 vías: paso a paso
El cableado de un atenuador de 3 vías es exactamente igual que el cableado de cualquier interruptor de 3 vías, ya que el atenuador reemplaza a uno de los interruptores.
- Comience apagando el disyuntor. Confirme esto con un probador de voltaje que muestre que no hay corriente fluyendo. Sepa qué cables tiene en cada caja. En una caja, debe tener la línea (vivo), dos cables viajeros y típicamente un conjunto de cables neutros. En la otra caja, debe tener la carga hacia la luz, dos cables viajeros y un conjunto de cables neutros. No importa qué interruptor elija reemplazar. Sin embargo, asegúrese de que la caja cumpla con los requisitos para conectar el atenuador.
- Para el atenuador, conecte la línea o la carga al terminal común del atenuador. Conecte los dos viajeros a cualquiera de los terminales viajeros del atenuador, que usualmente están indicados con tornillos de diferentes colores. Asegúrese de conectar todos los cables de tierra y devuelva los neutros a la caja.
- Desde la otra caja, continuará usando un interruptor estándar de 3 vías que tiene tanto el terminal común, que puede ser la línea o la carga, como los dos cables viajeros.
- Asegúrese de emparejar los viajeros entre ambas cajas.
- Pruebe el interruptor de luz desde ambas ubicaciones: encender las luces desde cualquiera de las cajas debería funcionar. El atenuador debe atenuar la luz desde la ubicación donde está instalado.
Punto importante a tener en cuenta: el cable que se conecta al terminal común en el dimmer depende de la caja en la que esté instalado. Si el dimmer está en el extremo de línea de la caja, entonces el terminal común se conectará al cable caliente. Si el dimmer está en el extremo de carga de la caja, el terminal común se conectará al cable que conduce a la luz.
Lista de verificación de compatibilidad del dimmer
Antes de comprar, realice esta lista de verificación:
| Verifique | Por qué es importante |
|---|---|
| Clasificación 3 vías (“single-pole/3-way”) | Un dimmer solo para un solo polo no puede controlar desde dos ubicaciones |
| Soporte para tipo de bombilla | LED necesita un dimmer clasificado para LED; CFL tiene requisitos específicos; incandescente/halógeno funcionan con la mayoría |
| Potencia máxima | No exceda la clasificación del dimmer (por ejemplo, 150–300 W LED, 600 W incandescente) |
| Carga mínima | Los dimmers para LED a menudo necesitan una carga mínima (5–10 W); por debajo de esto, las luces parpadean o no se apagan |
| Cable neutro | La mayoría de los dimmers mecánicos no necesitan neutro; la mayoría de los dimmers inteligentes sí |
| Voltaje | Estándar 120V (EE. UU.) vs 230V (Reino Unido/UE) — compre el estándar correcto |
| Profundidad de la caja | Los cuerpos de los dimmers son más profundos que los interruptores; confirme que su caja sea lo suficientemente profunda (se recomienda 35 mm+ en Reino Unido) |
| Tipo de carga (MLV/ELV) | Los transformadores de bajo voltaje magnéticos y electrónicos necesitan tipos específicos de dimmers |
Compatibilidad de bombillas: LED, incandescente, CFL y más
La compatibilidad de bombillas es donde realmente residen la mayoría de los problemas con dimmers 3 vías. El dimmer no está equivocado; simplemente la bombilla y el dimmer no están emparejados. Si está mezclando dimmers e interruptores en toda una casa, nuestra guía sobre qué es un interruptor inteligente y sus beneficios le ayuda a decidir entre atenuación mecánica e inteligente para cada habitación.
| Tipo de bombilla | Requisito del dimmer | Problema común si no coinciden |
|---|---|---|
| LED | “Dimmer clasificado como ”compatible con LED“ o ”LED+” | Parpadeo, zumbido, luces que no se atenúan por debajo de ~20%, cortes a bajo nivel |
| Incandescente / halógeno | La mayoría de los dimmers estándar | Pocos problemas; carga más tolerante |
| CFL | “Bombillas ”CFL atenuables” + dimmer compatible | Muchas CFL no son atenuables; las atenuables pueden parpadear |
| Bajo voltaje magnético (MLV) | Dimmer clasificado para MLV (diseño de borde de salida para transformadores) | Zumbido del transformador, rango de atenuación reducido |
| Bajo voltaje electrónico (ELV) | Dimmer clasificado para ELV (a menudo requiere neutro) | Parpadeo, ruido del transformador, daño al dimmer |
Se deben seguir los siguientes pasos antes de usar un dispositivo LED: asegurarse de que se emplea iluminación LED atenuable, asegurarse de que el dimmer trifásico esté clasificado para LEDs, verificar si se está alcanzando la carga mínima del dimmer (condición bajo la cual las bombillas LED no tendrán suficiente potencia para ser efectivas), y si el parpadeo sigue siendo un problema, consultar el sitio web del fabricante para bombillas certificadas.
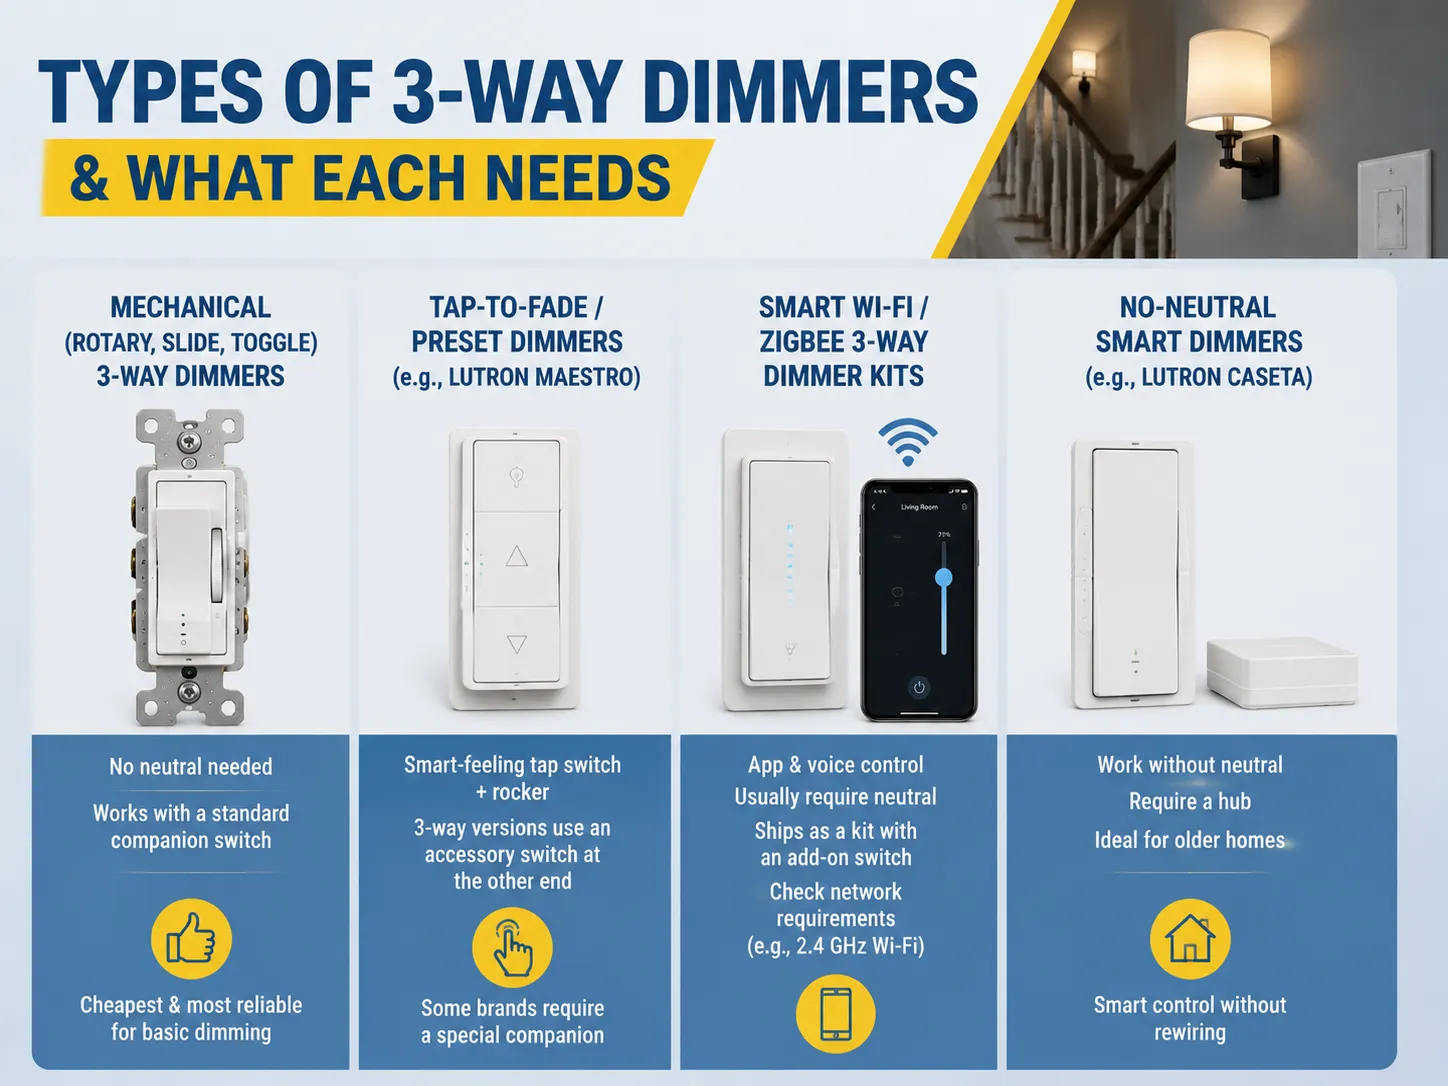
Tipos de dimmers de 3 vías y lo que cada uno necesita
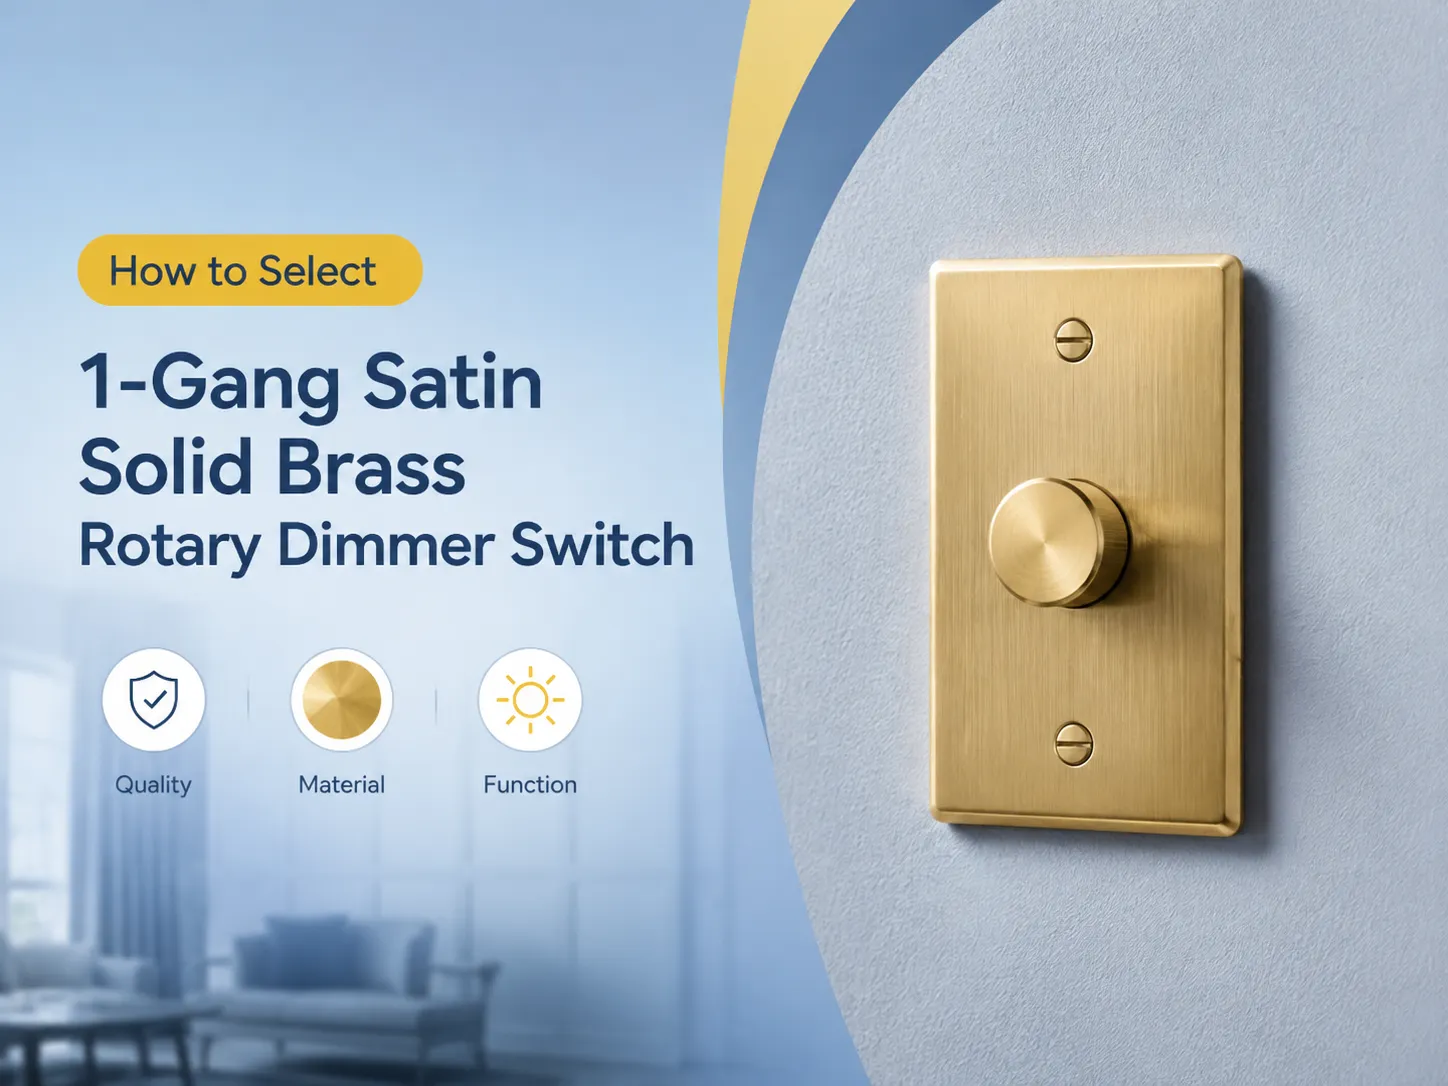
- Dimmers mecánicos (rotativos, deslizantes, de palanca): Este es el tipo tradicional que no requiere cable neutro y puede usar un interruptor compañero; es el método más económico y efectivo para atenuar.
- Dimmers de toque para desvanecer y preajustados (como Lutron Maestro): Son dimmers mecánicos que ofrecen una experiencia más moderna con su interruptor táctil + balancín; si son dimmers de 3 vías deben tener un interruptor de terceros en el otro extremo (algunas marcas pueden requerir un interruptor compañero).
- Kits de dimmers inteligentes Wi-Fi / Zigbee: Funcionan con la app y voz, usualmente requieren cable neutro, vienen en kit que puede incluir un interruptor piggyback o dos unidades emparejadas.
- Dimmers inteligentes que no requieren neutro: Algunos modelos (p. ej., Lutron Caseta) funcionan sin cable neutro si hay un hub (es especialmente efectivo en casas antiguas).
Dimmers inteligentes de 3 vías: Consideraciones especiales
La conveniencia es un beneficio de los dimmers inteligentes de tres vías, pero tienen consideraciones de compatibilidad:
- Cable neutro: A menudo se necesita un cable neutro en el sitio del dimmer inteligente, un cable que muchas casas, especialmente las antiguas, no tienen. Asegúrese de que haya uno antes de comprar.
- Interruptor compañero/adicional: Los sistemas inteligentes típicamente requieren un interruptor compañero especial instalado, por lo que no se puede usar un interruptor genérico.
- Algunos sistemas son un conjunto de dos dispositivos inteligentes emparejados (por ejemplo, un dimmer inteligente con un interruptor inteligente o dos dimmers inteligentes funcionando juntos), por lo que es esencial seguir las instrucciones incluidas en el sistema.
- Requisitos de red: Si se requiere una red Wi-Fi (2.4 GHz) o redes Z-Wave/Zigbee depende del sistema en cuestión.
- Carga mínima: Los dimmers inteligentes a veces tienen una carga mínima más alta, por lo que las luces LED de baja eficiencia podrían no funcionar con ellos.
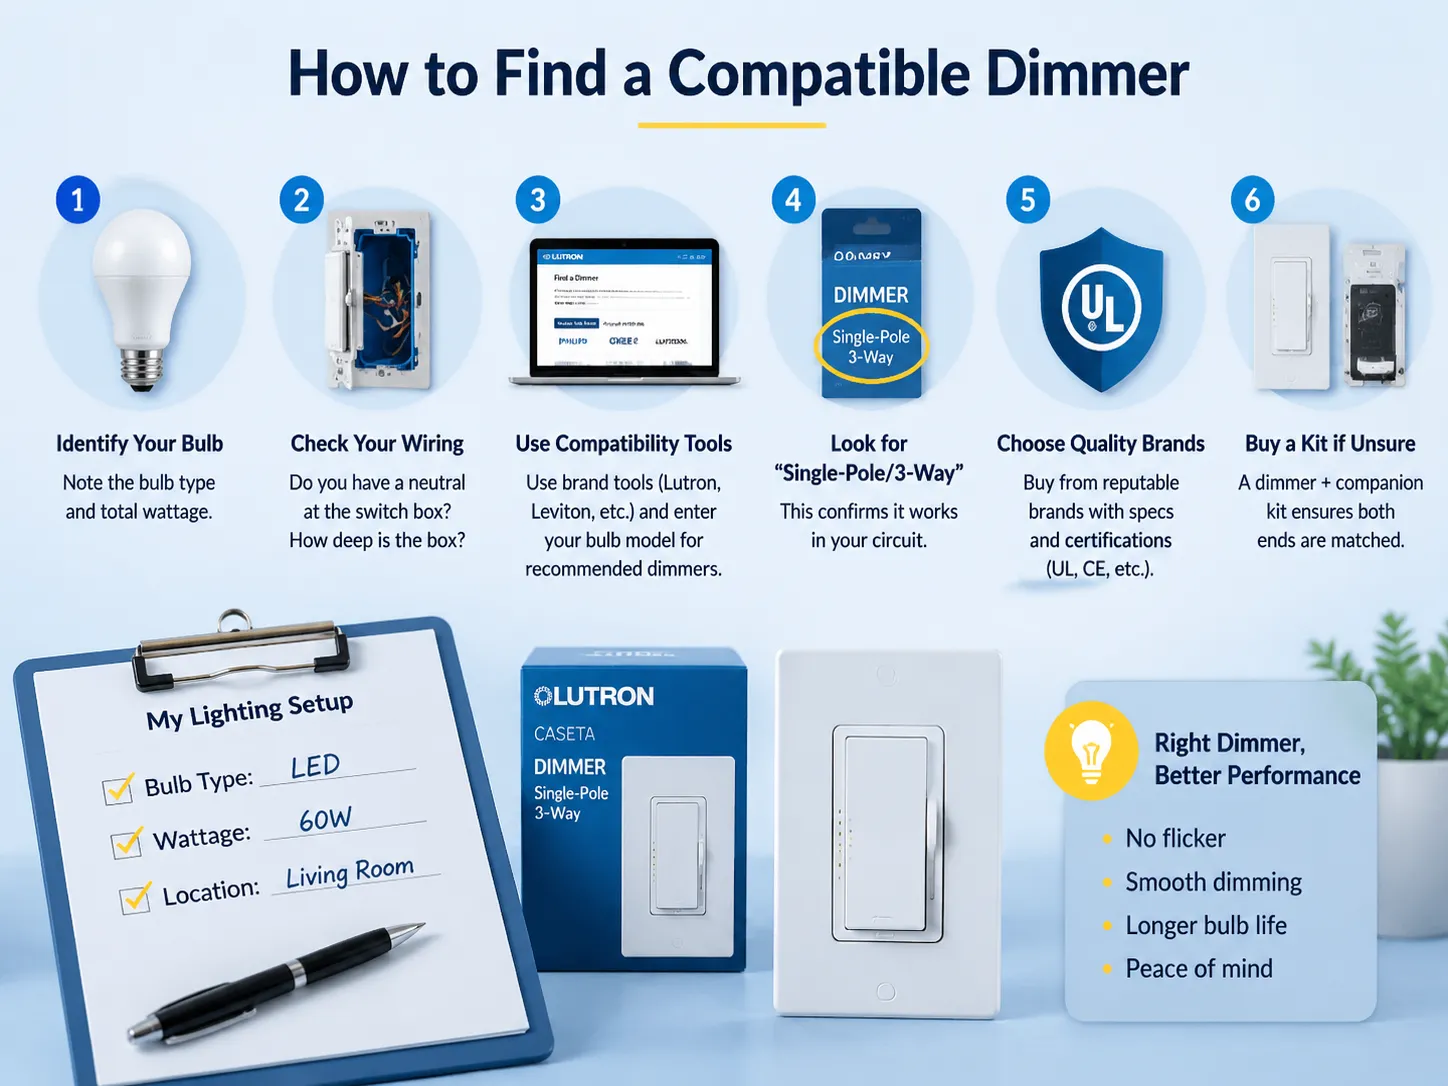
Cómo encontrar un dimmer compatible
Pasos a seguir para seleccionar el dimmer adecuado para uso en una aplicación de 3 vías.
- Determinar el tipo de bombilla junto con el consumo de potencia en vatios.
- Averiguar los detalles sobre la instalación, por ejemplo, ¿el enchufe tiene cable neutro?
- Utilice las herramientas en línea proporcionadas por los fabricantes para establecer la compatibilidad del tipo de bombilla con el dimmer.
- Verifique la información mencionada en los paquetes de los dimmers, por ejemplo, “usado en atenuación de uno o tres vías” o “es una combinación de un dimmer y un compañero de dimmer.”
- Seleccione un fabricante confiable que haya publicado las especificaciones del producto en internet y evite el uso de soluciones baratas no especificadas para configurar el sistema correctamente.
- En caso de duda, seleccione el kit de dimmer vendido por el fabricante.
Solución de Problemas Comunes
| Problema | Causa Probable | Solución |
|---|---|---|
| Parpadeo en niveles bajos de atenuación | Incompatibilidad LED/dimmer, carga por debajo del mínimo | Verifique la lista de compatibilidad de marcas; agregue una bombilla compatible o cambie el dimmer |
| Zumbido/ruido | Dimmer incompatible con LED o tipo de transformador | Use un dimmer clasificado para LED; para MLV/ELV, use el tipo de dimmer correcto |
| La luz solo funciona desde una ubicación | Los cables viajeros están conectados incorrectamente o el dimmer no está clasificado para 3 vías | Verifique la correspondencia viajero a viajero; confirme que el dimmer es SP/3W |
| Las luces no se apagan en la configuración baja | Carga mínima excedida hacia abajo; o corriente de fuga LED | Aumente la carga o use un dimmer con un mínimo más bajo; algunos necesitan adaptadores de carga mínima |
| Dos dimmers instalados, comportamiento extraño | Dos dimmers convencionales en un circuito | Reemplace uno con un interruptor estándar de 3 vías |
| El dimmer inteligente no se empareja | Red incorrecta, hub faltante, problema de neutro | Verifique Wi-Fi de 2.4 GHz, emparejamiento del hub y presencia de neutro |
Preguntas frecuentes
¿Se puede usar un interruptor dimmer en un circuito de tres vías?
En resumen, sí, pero necesitará comprar un dimmer que esté clasificado como dimmer de tres vías (busque “single-pole/three-way” en el paquete). El dimmer reemplazará uno de los dos interruptores de tres vías en su instalación eléctrica. El dimmer utiliza el mismo cableado viajero. El otro interruptor continúa funcionando como un interruptor de tres vías (enciende/apaga o cambia la luz) desde su ubicación sin un dimmer. Un dimmer simple de un solo polo no funcionará en esta configuración.
¿Necesita un dimmer en ambos lados de un interruptor de 3 vías?
En configuraciones convencionales de dimmers, solo se necesita un dimmer junto con un interruptor típico de 3 vías para otra ubicación. Usar dos dimmers convencionales en un circuito creará problemas de parpadeo y zumbido junto con una función poco confiable. Una excepción a esto es el uso de kits especializados de dimmers inteligentes emparejados que consisten en dos dispositivos interconectados (un interruptor dimmer inteligente y un interruptor remoto) instalados según las instrucciones.
¿Cómo encontrar un interruptor dimmer compatible?
Para asegurarse de que su dimmer y bombilla puedan funcionar juntos, identifique el tipo de bombilla y su potencia, verifique si tiene un cable neutro en la caja del interruptor y si es lo suficientemente profunda. Después de eso, visite los sitios web de Lutron o Leviton y encuentre una guía visual de compatibilidad. Al asegurarse de tener el dimmer correcto, busque uno que sea “single-pole/3-way”, verifique la posibilidad de usar su tipo de bombilla respetado (los dimmers para LED deben ser compatibles con LED), revise la potencia mínima máxima y realice la compra del producto certificado. Si está comprando un dimmer inteligente, verifique los mismos requisitos que se necesitan para el dimmer convencional que se instalará.
¿Se pueden usar juntos dos interruptores dimmer de 2-3 vías?
Los dimmers normales no pueden usarse juntos en un circuito de 3 vías ya que pueden interferir entre sí y causar parpadeo o zumbido. Se recomienda usar un dimmer junto con un interruptor normal de 3 vías. Sin embargo, los dimmers inteligentes están diseñados para instalarse en pares. Pueden incluir un dimmer inteligente junto con su interruptor adicional correspondiente, o dos dimmers inteligentes idénticos que se comunican entre sí. Si compró un dimmer inteligente que indica dos instalaciones, cumpla con el manual.
Referencias
- NFPA 70 — Código Eléctrico Nacional (NEC), Artículo 404: interruptores y dimmers
- UL — estándares de seguridad y compatibilidad para dimmers (UL 1472)
- Lutron — herramientas de compatibilidad para dimmers de 3 vías y documentación de productos LED+
- Leviton — tablas de compatibilidad de dimmers y guías de instalación
- DOE de EE. UU. — orientación sobre atenuación e iluminación LED
- Trowbridge Electrical — Mejores interruptores de 3 vías con dimmers (guía de compatibilidad)
- 101 Generator — Los mejores interruptores dimmer de 3 vías para luces LED
Conclusión
La compatibilidad de los dimmers de 3 vías es relativamente sencilla una vez que se aprenden los principios básicos: necesita comprar un dimmer “single-pole / 3-way”, instalar un dimmer junto con un interruptor estándar de 3 vías en el otro lado del circuito, asegurarse de que el dimmer sea compatible con las bombillas que está utilizando y verificar el cableado en términos del sistema en general y para aplicaciones futuras — el neutro (para dimmers inteligentes), la profundidad (para la caja) y la potencia (carga).
Los dos errores comunes son obtener un dimmer single-pole para un circuito de 3 vías y combinar una carga LED moderna con un dimmer antiguo — ambos se pueden evitar fácilmente consultando la lista de verificación anterior y las herramientas de compatibilidad para dimmers y luces en el proyecto.