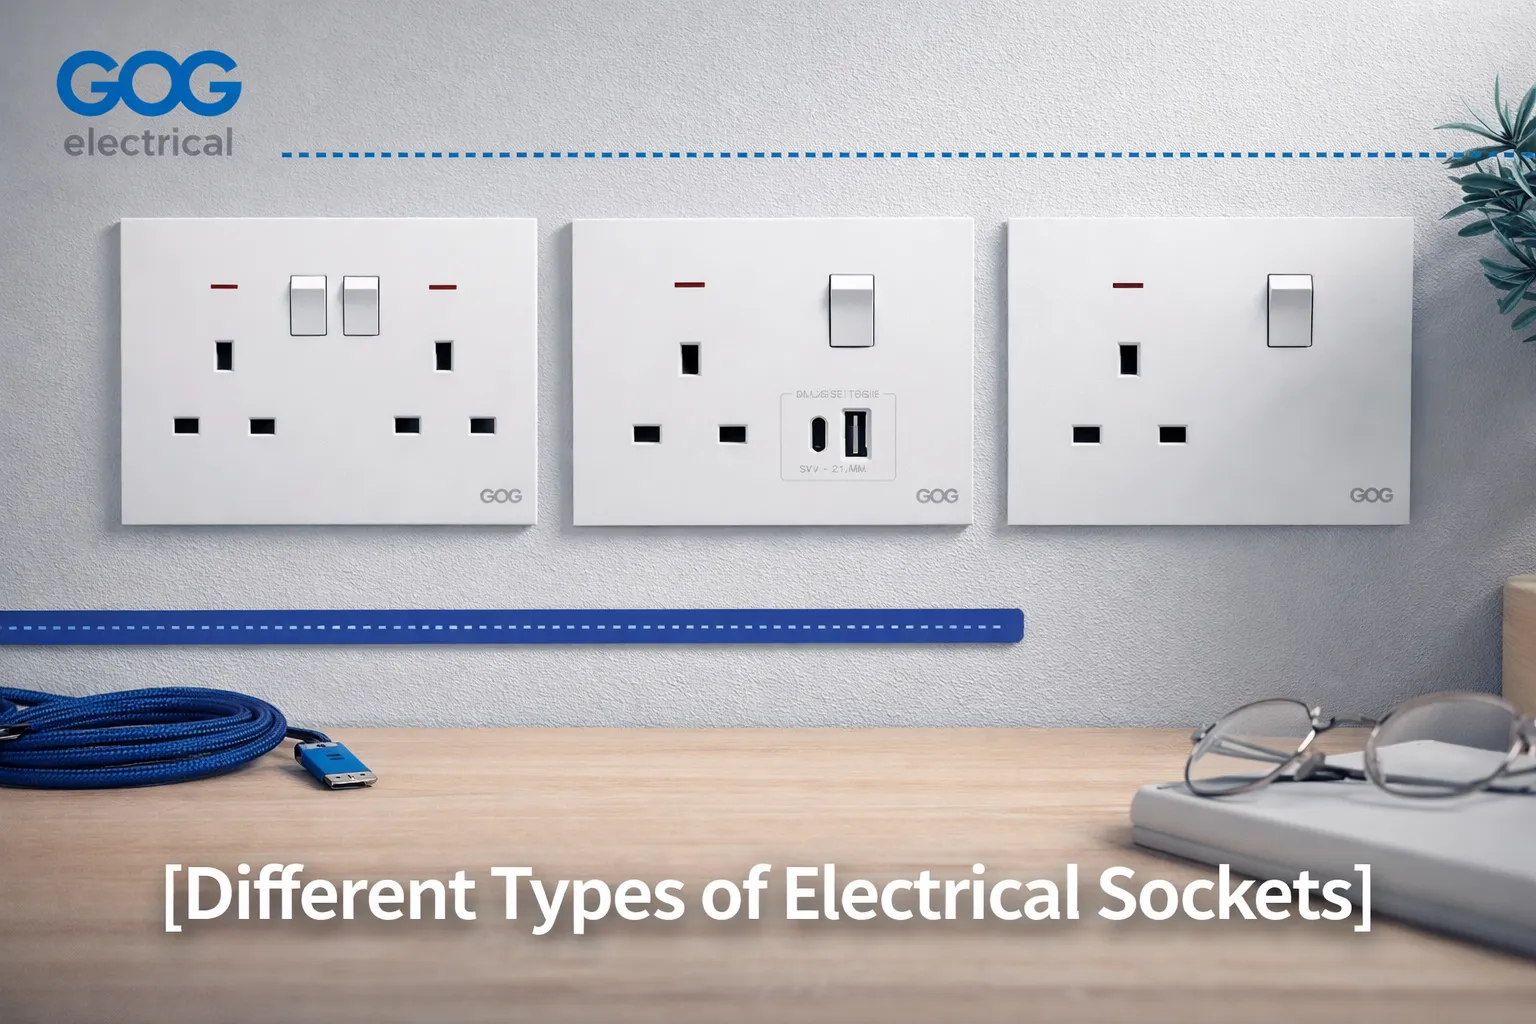
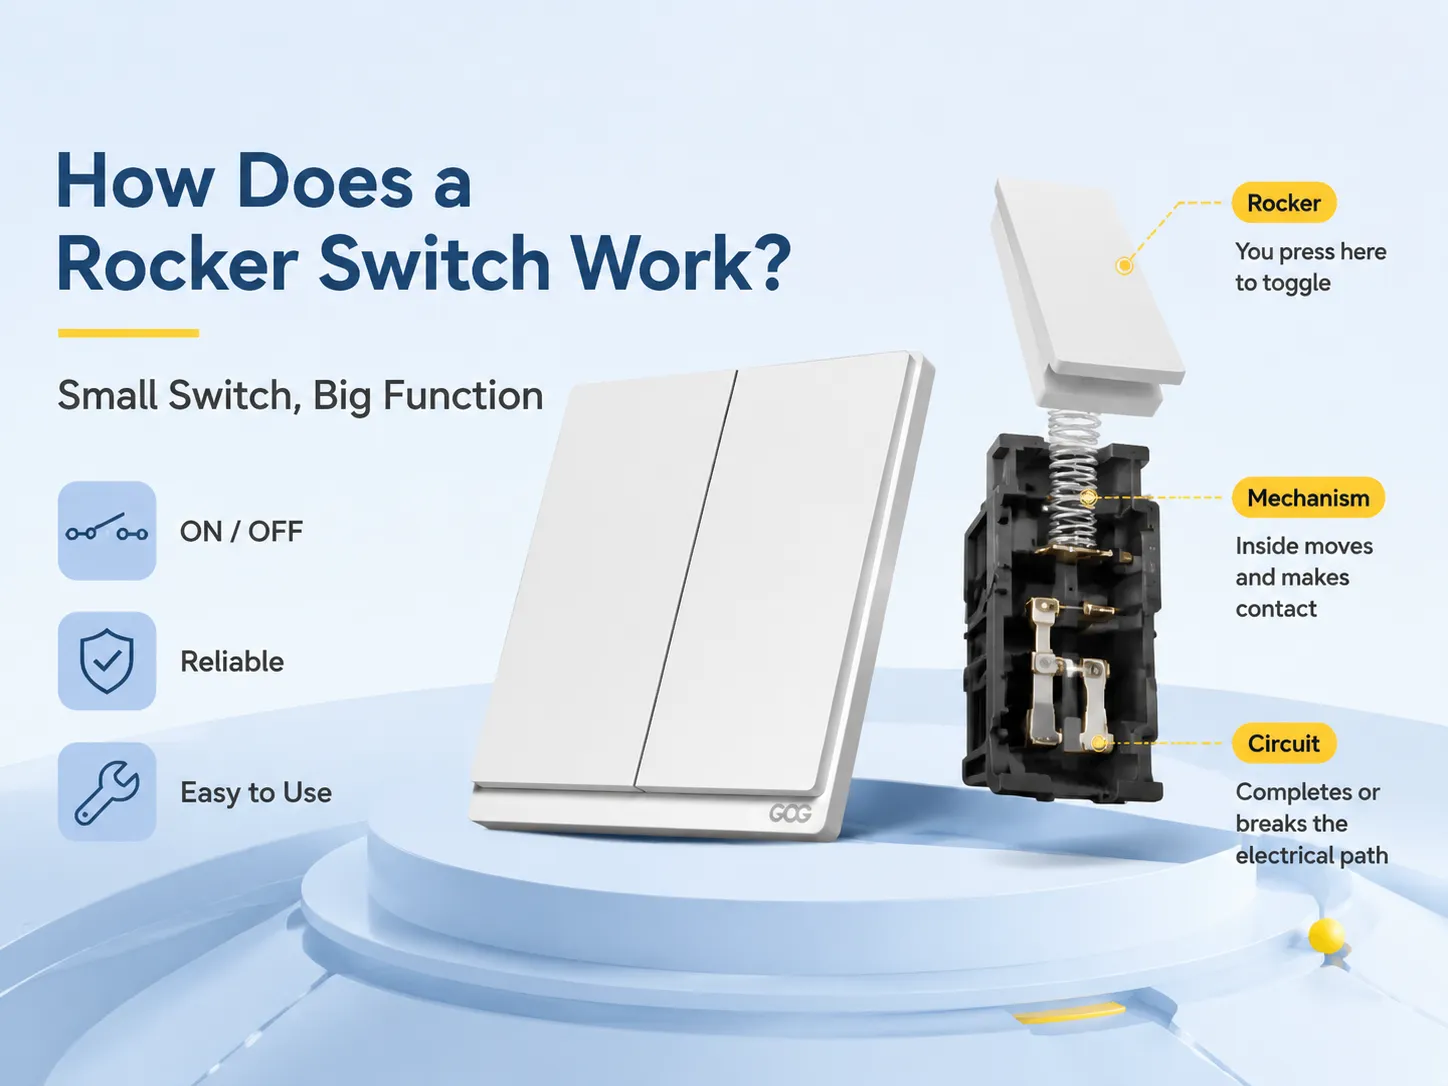
If you enter any house, workshop, or gadget, you will see a lot of them: the big, rectangular buttons you push from one end and that move like See-Saw. They can turn on lights, tools, coffee machines, or even industrial devices. But what really takes place inside the plastic rocker when you push it? Understanding how a rocker switch functions, what are its elements, how it is connected to the power source, and how to use it to make other electrical projects easier is an important piece of information.
In brief, a rocker switch operates using a fundamental seesaw method. Pressing one end of the rocker causes its pivot to go downwards, leading to an internal contact arm either making contact with the fixed terminal or moving away from it. Being a mechanical latching switch, it does not change its position once it is set. The rocker switch has an “I” symbol to show ON and an “O” symbol for OFF.
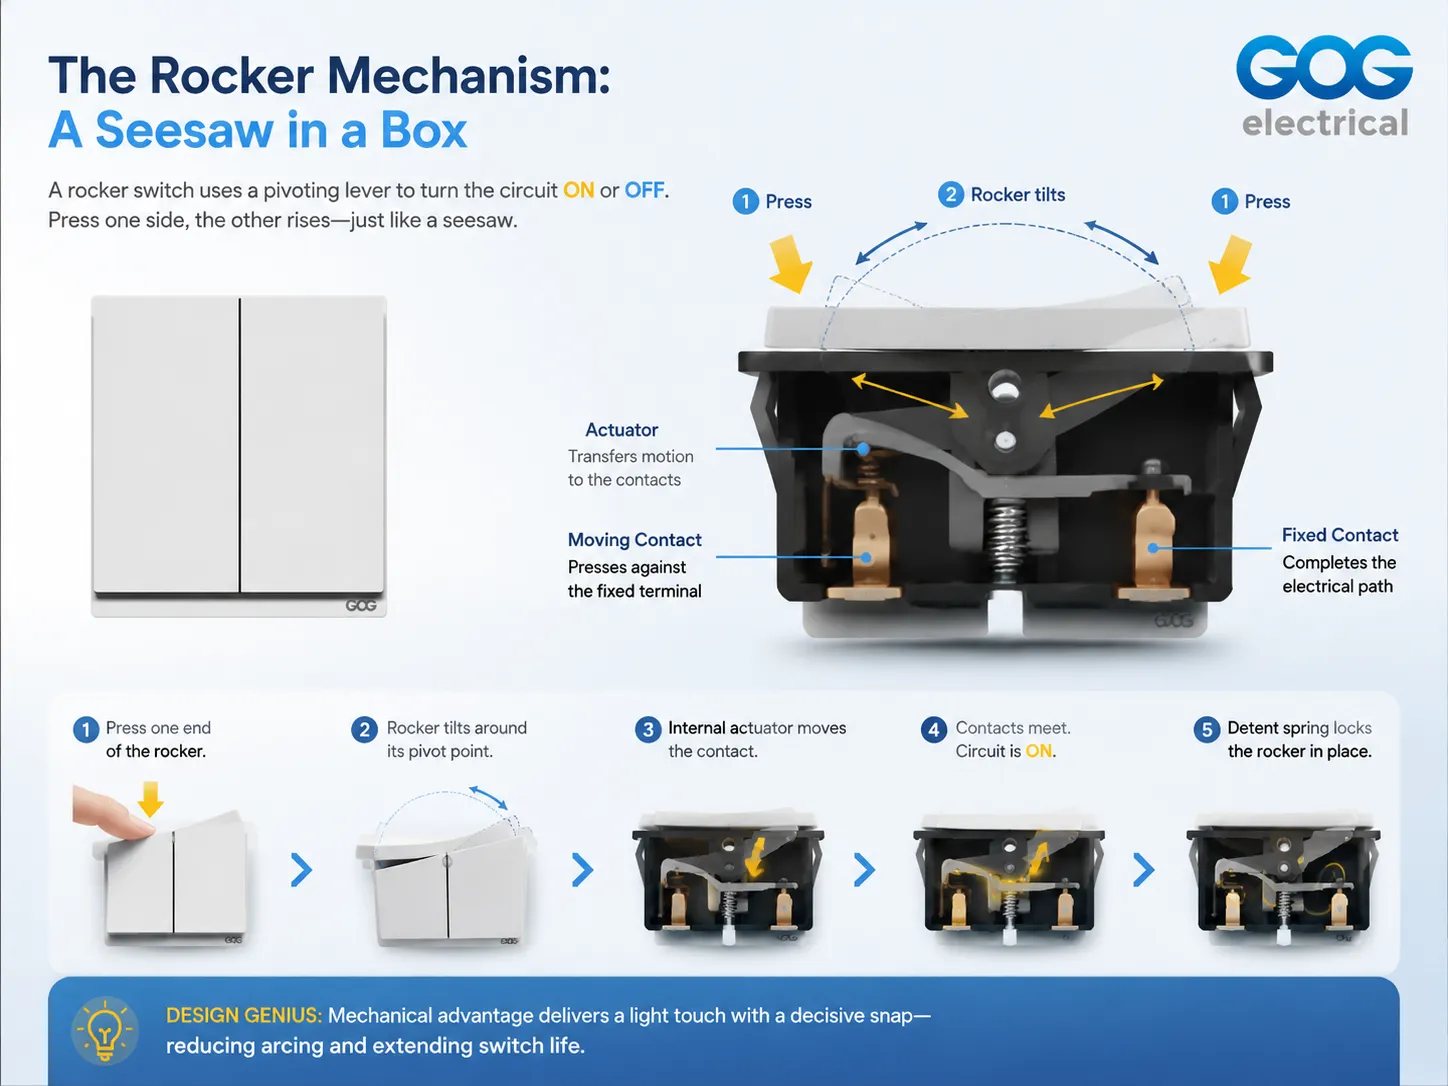
The Rocker Mechanism: A Seesaw in a Box
The type of switch in question is known as “rocker switch”, exactly because it contains a rocker. The rocker itself is a lever that can rock back and forth like a seesaw in the playground. Therefore, pressing a higher end of the rocker paddle will result in elevation of its lower edge, namely, the switch being in off position.For instance, below is the sequence of press of a typical rocker switch which results in its switching on:
- Your finger presses one of the rocker paddle ends.
- The paddle rocks back and forth.
- This facilitates the act of pushing small actuator driving the contact arm towards the terminal contact.
- Then the moving contact applies itself to the fixed terminal contact.
- After that the circuit becomes closed and the current starts flowing.
- The spring detent fixes the rocker in that position.
The cleverness of the design is that one has an important advantage, i.e. long paddle can be pressed easily while the internal lever converts this small movement into the important fast snap of the contacts.
Internal Parts: Contacts, Springs & Terminals
Open up a quality rocker switch and you’ll find a handful of simple parts doing the work:
| Part | What It Does |
|---|---|
| Rocker paddle | The part you press; rocks around a pivot |
| Pivot / fulcrum | Central point the paddle rotates around |
| Contact arm | Spring-loaded arm that carries the moving contact |
| Moving contact | Silver-alloy button that makes/breaks the circuit |
| Fixed contacts (terminals) | Stationary contacts connected to the wiring |
| Detent spring | Snaps the rocker into ON or OFF position (latching) |
| Housing | Molded plastic body that insulates and aligns everything |
What makes silver contacts such a great choice? Silver provides outstanding conductivity, very low contact resistance, and an ability to withstand pitting caused by arcing. High-current switches often also come with some form of arc suppression. The arc is smaller if the contacts break up faster. This is why cheap switches feel mushy and fail sooner: their contacts are opened sluggishly, burning them a little bit more with each operation.
Which Way Is On and Off? The I/O Symbols
On a rocker switch, the meaning is inscribed into the paddle: “I” indicates that it is ON and “O” means that it is OFF (the IEC 60417 symbols explain the relation between 1 = on and 0 = off). Press the “I” end down and the switch is ON; press the “O” end and the switch is OFF.There are many important things to keep in mind about these symbols:
- In case of wall light switches, rockers are usually installed without any symbols and are oriented vertically – if the top section is pressed down, it means it is ON and if the bottom section is pressed down – it means it is OFF. However, always remember to check the paddle marking because it could differ by manufacturer.
- In case of appliance rockers (power strips, computers, coffee makers etc.), the I/O symbols are usually printed on the paddle itself.
- In case of using rockers without any marks, it is easy to tell whether the switch is ON or OFF by looking at its “pressed in side”: if the top section pressed in, it is usually ON. Otherwise, it is better to test it with meter or lamp – never presume it is ON.
A memory trick to remember: the I looks like a vertical straight line which means closed circuit and the current is flowing while the O resembles an open loop which means there is a broken circuit.
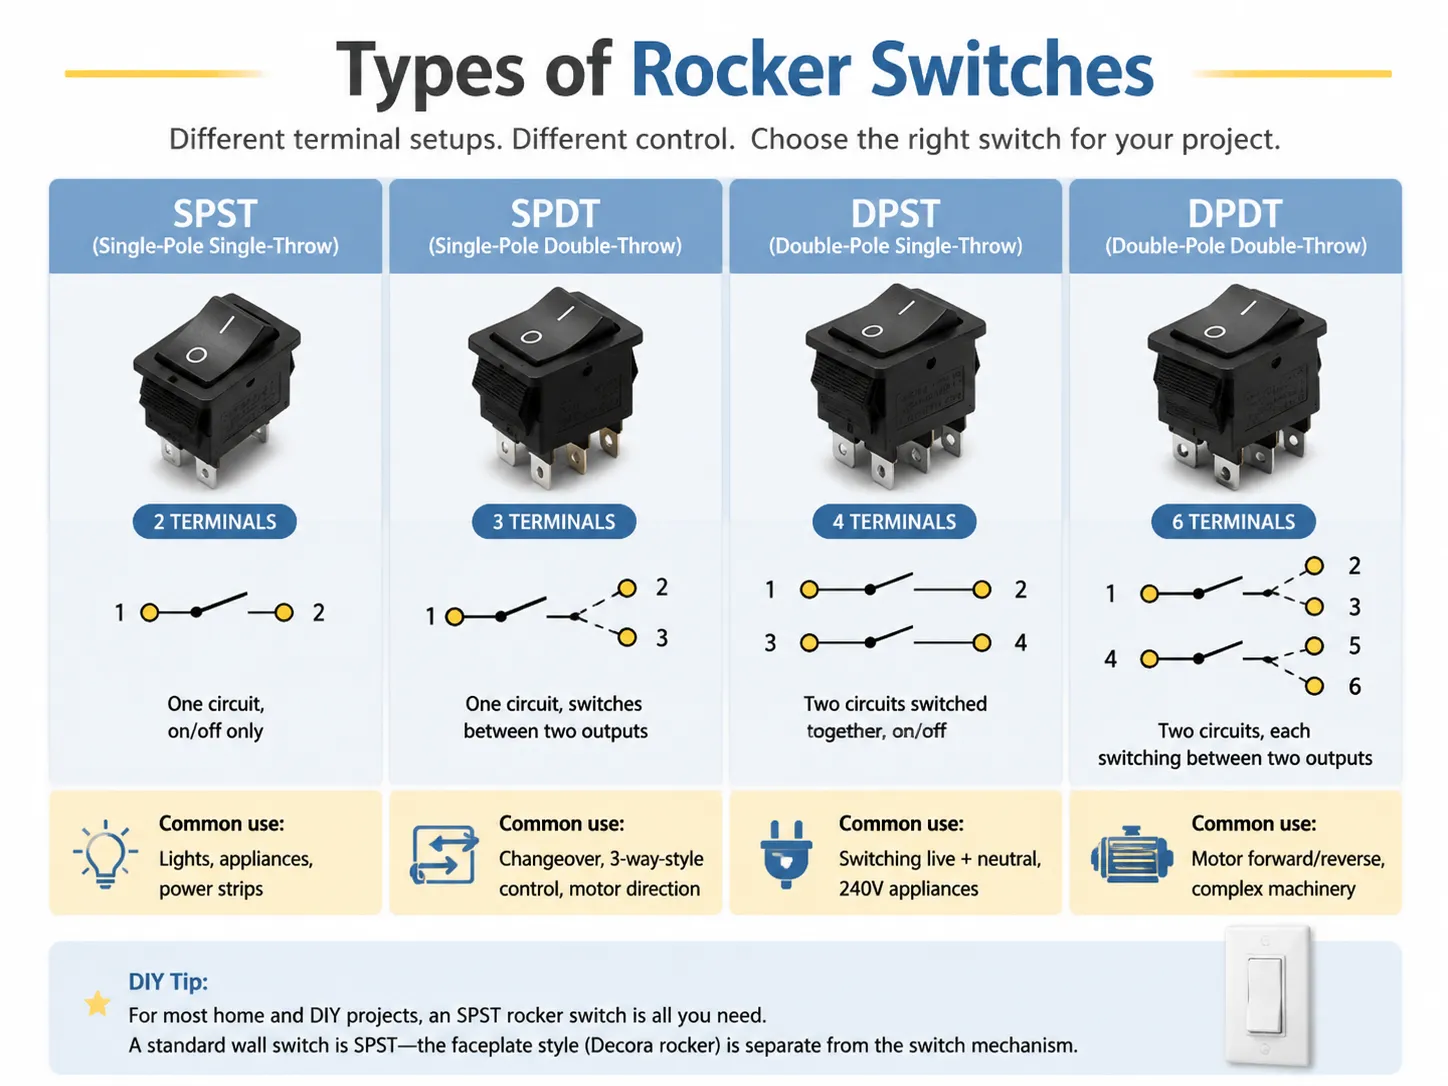
Types of Rocker Switches: SPST, SPDT, DPST, DPDT
Rocker switches are sold in four standard circuit configurations, and the number of terminals tells you which one you have:
| Type | Terminals | What It Controls | Common Use |
|---|---|---|---|
| SPST (Single-Pole Single-Throw) | 2 terminals | One circuit, on/off only | Lights, appliances, power strips |
| SPDT (Single-Pole Double-Throw) | 3 terminals | One circuit, switches between two outputs | Changeover, 3-way-style control, motor direction |
| DPST (Double-Pole Single-Throw) | 4 terminals | Two circuits switched together, on/off | Switching live + neutral, 240V appliances |
| DPDT (Double-Pole Double-Throw) | 6 terminals | Two circuits, each switching between two outputs | Motor forward/reverse, complex machinery |
When doing household or DIY tasks, there is a possibility that you will need an SPDT switch, which has two terminals connected with the supply side in one terminal and the load on the other. If you are changing a wall switch into a rocker switch, keep in mind that a typical wall switch is simply an SPDT and the style and installation of the rocker switch (Decora-type plates) does not matter in terms of functioning.
Latching vs Momentary: Does a Rocker Stay On?
This is a key trait of rocker switches since most are latching. They will remain in the ON or OFF position by locking in until pushed again, meaning that when you press it ON, it will stay ON permanently, even when you lift your finger. That is why they are perfect for wall lighting, tools, and appliances.
In contrast, there’s another category known as momentary rocker switches. They look the same from the outside, but you should check the data sheet or description before purchasing. These switches are used for jogging control systems, doorbells, winches, and interlocks — that is, in all applications where the switch needs to be operated only while pressed. If you accidentally buy a momentary rocker instead of a latching one for your wall lights, the lights will only operate when the paddle is held down.
How to Wire a Rocker Switch
The installation of a normal 2-terminal SPST rocker switch (the most frequently used type) follows simple wiring, but the important factor is to follow safety steps first:
- Shut off power at the circuit breaker and check with a voltmeter.
- Locate the supply (hot) wire from the source and the load wire running to the particular device.
- Join the supply wire to one terminal and the load wire to the other one. There is no difference which wire goes to which terminal in a standard SPST, as SPST circuits are symmetrical. This is the reason why people reply “Matter? No, for SPST.”
- Use a safety screw if possible and connect the ground wire.
- Secure every screw tightly, hide the wires, and finally install the switch in place.
The connections from an SPDT switch (three terminals) comprise a common terminal (denoted as C or COM) and two switched output terminals (NO or NC). The live circuit is connected to the common terminal and the output is obtained by connecting to one of the output terminals, depending on which output you need. The situation changes when working with a DPST switch (four terminals) where both wires (live and neutral) are switched as two independent circuits. It is important to connect the correct pairs of terminals appropriately.
As a pay-off tip for replacing old switches, make it a point to take a picture of the wiring before disconnecting the switch. Similarly, in case a new switch is wired differently, one can easily refer to the photo along with the terminal labels of the new switch to avoid confusion and mistakes. If you’re replacing a dimmer or adding one, our LED dimmer compatibility guide explains which rocker-style dimmers match modern LED lighting.
Illuminated Rocker Switches: How the Light Works
A lot of rocker switches have a built-in small light indicator that helps to see the switched condition. There are two types of designs:
- Neon indicator: is the small neon bulb that is connected in series with a resistance on each side of the switch. It works when the power is turned ON; it means it is ON when the load OFF and vice versa (the classic rocker glowing you see on power strips).
- LED indicator: is the LED with a series resistance instead; the wiring in this case can be done in such a way that the LED is ON when the switch is ON (the most common variation for premium switches and illuminated wall plates).
Because the illuminated switches consume a small amount of current and in the case of neon types can also cause glowing of LED bulbs when the switches are TURNED OFF, which is the common issue of such installations; while using the illuminated rocker together with LED lighting and having a faint light in the dark, means that the indicator circuit is bleeding some current and the solution for it is using the snubber or changing the switch type.
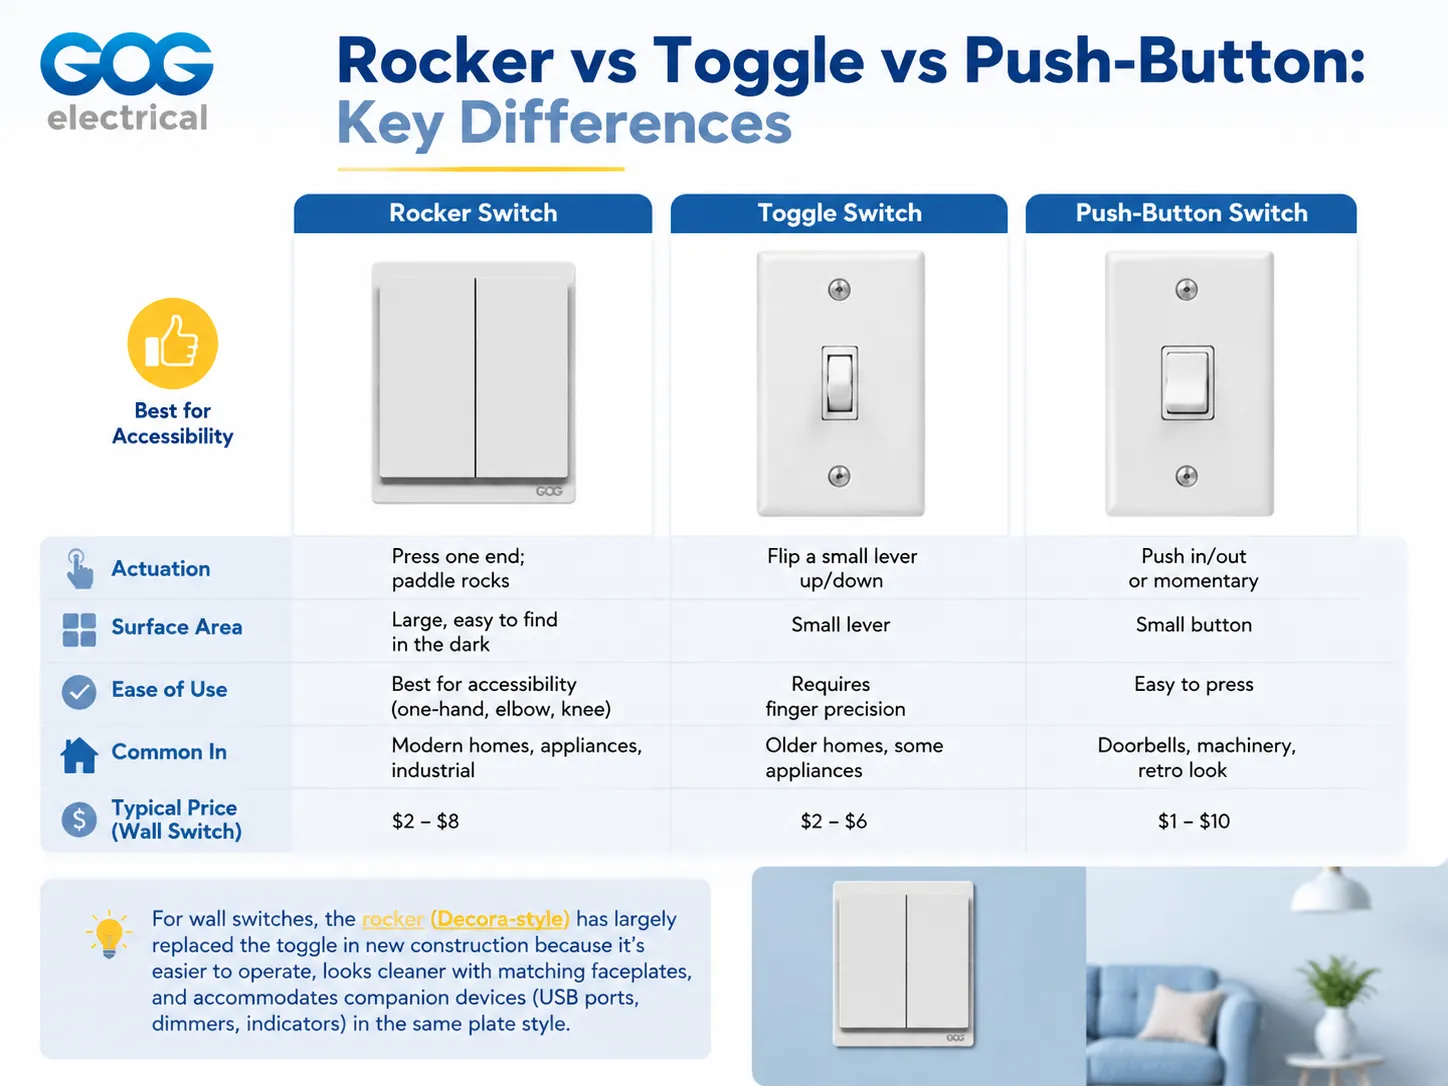
Rocker vs Toggle vs Push-Button: Key Differences
Rocker switches are often confused with toggle switches because they do the same job. Here’s how they compare:
| Feature | Rocker | Toggle (traditional lever) | Push-button |
|---|---|---|---|
| Actuation | Press one end; paddle rocks | Flip a small lever up/down | Push in/out or momentary |
| Surface area | Large, easy to find in the dark | Small lever | Small button |
| Ease of use | Best for accessibility (one-hand, elbow, knee) | Requires finger precision | Easy to press |
| Common in | Modern homes, appliances, industrial | Older homes, some appliances | Doorbells, machinery, retro look |
| Typical price (wall switch) | $2-$8 | $2-$6 | $1-$10 |
In recent years, the rocker (Decora) design has gradually replaced the toggle in wall switch manufacturing, due to its ease of use, cleanliness in terms of appearance with matching faceplate designs, and capability in terms of allowing companion switches (such as dimmers and indicators) in the same faceplate style to be used together. If you’re curious about the full family of wall switch types — from single-pole to 3-way, 4-way, and double-pole — the neutral vs non-neutral smart switch explainer also shows how modern rocker-style smart switches differ in wiring requirements.
Where Rocker Switches Are Used
The reason why rocker switches can be found in so many designs is because they are affordable, trustworthy, and simple to handle.
- Wall light switches – the rocker appears as a Decora-style switch in the USA and Canada.
- Extension cords and power strips – the switch used on the surge protector with a light indicator.
- Household appliances – coffee machines, rice cookers, heaters, ventilators, and any power tool.
- Automotive and marine industry – dash rockers used for auxiliary circuits and illumination.
- Industrial automation – industrial sealed rockers with IP rating used for equipment functioning.
- Medical technology – mechanical rockers used in medical devices with high reliability (50K+)
Troubleshooting Common Rocker Switch Problems
| Symptom | Likely Cause | Fix |
|---|---|---|
| Switch feels mushy / no snap | Worn detent spring or contact arm | Replace the switch (cheaper than repairing) |
| Switch is hot to the touch | Overloaded circuit, loose terminal, or undersized switch | Check load rating; tighten or replace |
| Crackling or sparking sound | Arcing from worn/pitted contacts | Replace immediately — fire hazard |
| Light flickers when on | Loose connection or failing contact | Tighten terminals; replace if persistent |
| Switch on, but nothing works | Broken contact, wrong wiring, or tripped breaker | Test with meter; check the circuit |
| Illumination never shows | Indicator bulb/LED failed, or mis-wired indicator | Replace switch or re-check indicator wiring |
A rocker switch is essentially a component that has a limited number of operations, which can range between some 100,000 to 200,000 depending on the quality and rating of the device. Whenever a rocker switch fails, replacing it with a new one is the most common solution since rocker switches are cheap to buy and can be easily found anywhere.
Prices & How to Choose a Quality Rocker Switch
Prices vary widely with rating, features, and brand:
| Type | Typical Price |
|---|---|
| Basic SPST rocker (16A, panel mount) | $1-$4 |
| Illuminated rocker (16A) | $2-$6 |
| Decora-style wall rocker switch | $2-$8 |
| Waterproof / IP65 sealed rocker | $4-$12 |
| Smart rocker switch (Wi-Fi/Zigbee wall switch) | $15-$40 |
| High-current industrial rocker (20A+) | $8-$25 |
The things that distinguish a quality rocker from an inexpensive rocker are the following :
- A clear rating — to begin with, the rating such as 10A/16A/20A along with the voltage (e.g., 16A 250VAC) should be clearly indicated. This can also include appearance of UL/ENEC marks.
- Use of silver or silver-alloy contacts — it implies that the rocker should not be made of bare copper or steel as they create a lot of arcing and pitting.
- A good feel of detent — it should ensure a nice click during the switching.
- Reliable construction of terminals — it means the screws and quick connect tabs that hold the wires need to be reliable in their operation.
- Conformity of insulation does — UL 61058 or IEC 61058 compliance with respect of appliance switches.
In case, buyers have to buy switches in bulk from contractors, wholesalers, and property managers, they should pay close attention to the quality of the end product. When smart features are on the shopping list, a rocker-style smart switch like the 2-gang Tuya/Zigbee smart light switch shows how the classic rocker interface carries over into app- and voice-controlled devices.
Frequently Asked Questions
Which way is on and off on a rocker switch?
There are printed signs: a sign “I” refers to the ON state while “O” tells about the OFF state, by pressing the “I” side, it is possible to make it work, and by pressing the “O” side, the opposite can be achieved. For switches that are not labelled, the pressed side indicates the state; if the upper side is pressed, it usually shows that the switch is in ON mode but it is better to test it with a lamp or a meter in case of doubts since you cannot consider anything in the case of unlabeled switches.
How do you know if a rocker switch is on or off?
There are three methods of checking the I/O switches. The first method is to read the I/O symbols imprinted on the switches, where I indicates on and O indicates off. The second method is to examine which side is pressed in as this side will be the active side. The third method is to check the position by looking at illuminated switches as the indicator light will show the switch position. You must remember that some neon type switches will be glowing even while the load is turned off, so check if the system is energized after reading its symbols.
Which wire goes where on a rocker switch?
With regards to a two terminal SPST rocker switch, there is no difference which way the switch is connected. The supply is connected to either terminal to get either – terminal switched. ompletely different for a three terminal SPDT, however, where the supply goes to the common terminal, and the output is switched on to one of the two outputs.
Does a rocker switch stay on?
Indeed, it can be said that rocker switches are mostly latching (or maintained), in the sense that they will automatically be engaged and stay in the ON or OFF position till pressed again. This makes them perfect for electric light and appliances. Momentary rocker switches are other types, which spring back when released; they are employed in jog control applications and also interlocks. Please remember to check the technical specifications before you purchase anything.
<h2References
- NFPA 70 — National Electrical Code (NEC), Article 404 Switches
- UL Standards — UL 61058 Switches for Appliances
- IEC 61058 — Switches for Appliances (International Standard)
- Mouser Electronics — Rocker Switch Datasheets & Technical Resources
- IEC 60417 — Graphical Symbols for Equipment (I/O Power Symbols)
- Digi-Key — Rocker Switch Selection Guide
Conclusion
Rocker switches are straightforward devices, consisting of simple components such as: the rocker paddle itself, the pivot, a spring-loaded contact arm, and two silver contacts. Pushing one end of the paddle will close the circuit, and pushing from the other end will open it. Rocker switches are also able to stay in one position; thanks to the symbols on the switch, it is easy to determine whether it is ON or OFF. In case you need to replace the light switch, create a device, or connect a control panel, knowing how rocker switches work and what the difference between the momentary type and latched types, as well as SPST and DPDT, will allow you to choose the appropriate switch for your needs and complete the installation.For a deeper look at the other switch types you’ll meet around the home, our overview of the four types of light switches and the guide to replacing a light switch round out the picture.